Home of The French Marketplace

La joie c'est le partage
{ the joy is in the sharing }

Wednesday, November 30, 2011

Christmas Bird Decoration Tutorial

First I have to apologize that I didn't have this posted two days ago like I said I would.  I just got a little busy and it had to wait....I'm sorry!

Anyway, on to the glittered bird ornament.  This is so simple really, I should probably call it a "where to find the birds post" rather than a tutorial.

I was at Walmart with my husband last week and he was looking for a few hunting supplies.  While standing there next to him, I spotted this bag of birds.

Only, I wasn't picturing them hanging up in the trees fooling other doves...I was imagining three French hens, two turtle doves, and a partridge in a pear tree...sorry...but you get the idea.

I excitedly picked them up and threw them in the basket, all the while my husband is watching me, wondering what I'm going to do with a bag full of dove decoys. 

I smiled at him and said, "I'm going to put them on the Christmas tree.  Just wait, you'll like them."


They really aren't all that spectacular on their own so this is what I did.
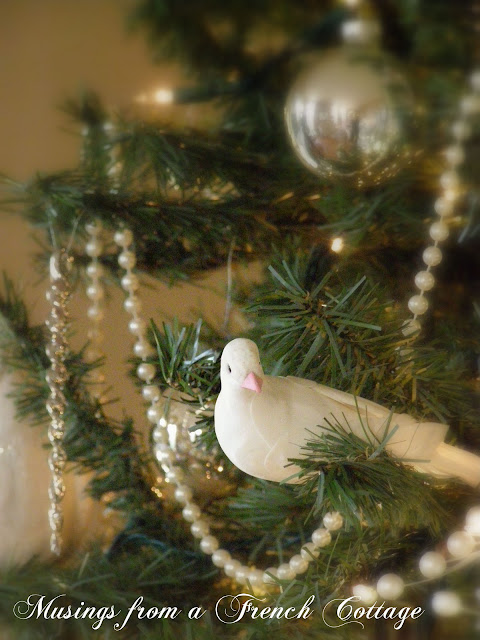
I simply spray painted them white with Rustoleum 2x Painters Touch in Heirloom White.  After the paint dried, I brushed the whole thing with Mod Podge then sprinkled them with clear glass glitter.  Once they dry, brush off excess glitter and clip onto the tree!
(they already have clips attached..or loops of you prefer to hang)

I love them now!

The birds can be found in the hunting section of your local
Walmart.  They're on clearance right now for $9.00 for a pack of six.  They are also sold separately if you only want to make one or two.  They're priced at $1.50 if you buy them individually so the cost is the same.
Enjoy and have a great week!

xo and God Bless,
Kathleen

Sunday, November 27, 2011

Christmas in the Air

We're doing lots of decorating and lots of listening to Christmas music.  I love this time of year... it's true meaning is very special.  There is much peace, love and happiness and I enjoy making the house sparkle to reflect that!

I've redone my chalkboard on the mantle for Christmas.  Now I just need to get some fresh greenery to tuck in here and there.

These are the birds I worked on last week that I mentioned earlier.  I'm going to post tomorrow about how I did them.  A fun project that was very easy to do.  The product of sudden inspiration while at the store shopping with my husband. 
Be sure to come back tomorrow for the how-to!

Some reindeer that I added to the mantle alongside the chalkboard

Hope you're all having a wonderful weekend!


xo and God Bless,
Kathleen

Saturday, November 26, 2011

Meet Jack!

Meet Jack!
He's the newest furry addition to the family.
After much thought, we decided to get another lab.  They are such wonderful dogs and so good with children too.  

This sweet little guy fits right in and is loved by all.  The children are beside themselves and our current lab loves him too!  We picked him up last night and everyone has been enjoying him so.  There has been much running, playing, laughing and dare I say...barking!

I think we've worn him out!

~ ~ ~

I hope everyone had a wonderful Thanksgiving.  We had a lovely one and are gearing up for Christmas now,  We've got one of our trees up and of course Jack is fascinated with the lights.

Have a happy weekend!
xo and God Bless,
Kathleen

Thursday, November 24, 2011

Happy Thanksgiving!

 
Happy Thanksgiving everyone.  May you all have a blessed day!!

xo and God Bless,
Kathleen 

Tuesday, November 22, 2011

A French Coffee Table

Hello!  Is everyone just about ready for Thanksgiving?  Two more days!!
I have been working on projects like a crazy woman all weekend as well as yesterday and today.  I have completed a lot though.  I painted and finished three tables, finished 3 burlap table runners, reworked our coffee station, hung a menu board, worked on some really cool glittered birds for Christmas decorations(which I cannot wait to show you!!), did a little furniture rearranging and last but not least, I began just a teensy bit of Christmas decorating today.  Whew...that was a mouthful!  I promise you though, I did not ignore my husband or kids...I kind of worked these projects into a bit of spare time .  I typically don't go on project binges like this but I just had too many unfinished things lying around that needed my attention.  It was time to get them done. 
 Okay, I've gotten off track...so back to the French table
I found another wonderful graphic from The Graphics Fairy (love her!)  I have been wanting to paint this on a table for awhile now, but didn't know how to enlarge it without having to invest in an overhead projector or pricey photo software.  Well, as luck would have it, there is a website that will do this for you for free!  Wha??  Free?? 
Yes!  Karen has a complete tutorial on how to do this.  The site is called BlockPosters and you can upload any photo from your computer to be enlarged.  You just decide how many sheets of printer paper you will need to cover your surface and block posters will enlarge your photo into a grid pattern.  Then you print it out, piece it together and voila!  Instant pattern.

So here it is all taped out, ready to trace with my pen.  What you do is rub over the back of your paper with chalk, lay the image down on your surface as pictured above, then begin to carefully trace over the whole thing.  When you're finished, pick up your paper and the image is left behind.  Now you fill it in with a paint pen or a very thin brush and acrylic paint.

Here it is after I finished all of the lettering.  Notice anything missing?  Um yeah, the "DE" in between the first two words.  You see, after I spent a half hour tracing each little letter, flourish and scroll, I excitedly lifted my paper to reveal......a BIG giant smear of yellow chalk.  Yep, that's right.  I couldn't tell one letter from the next.  I couldn't see where one word began and the next one finished and since my hand was about to fall off  a little sore from all that tracing, I just decided to wing it...do the best I could and not worry about whether or not it was perfect.  It's supposed to look old and vintage anyway right?  Since I couldn't see the "DE", no "DE" went in there.  The funny thing is, I didn't notice it right away.  Something was off, but I couldn't quite figure out what it was.
When it was done, I kept looking at it, feeling like something was missing. 


When it dried, I distressed it a bit and then I glazed it.  Despite the missing "DE" I still really like it!  There was a lot of love put into this table and now she's sitting all cozy in front of the sofa in the basement family room.
 
Would you believe it took me two days to figure out that the "DE" was missing?
Go figure!

Have a great week!
xo and God Bless,
Kathleen

Saturday, November 12, 2011

To Market, to Market...Make a French Market Basket

A French market basket, who wouldn't want to have one?  I know I always have but they're quite pricey!
Never fear though, I found out how to make one of your very own.  

You see this basket?  I got it from Joann Fabric's.  It even comes with wheels!  A little bit of craft paint and a little bit of sewing is all you need to transform it.


Now, I didn't come up with this idea all on my own.

No, I found it on someone else's blog and when I saw it, I couldn't believe my eyes.  I was so excited to try it myself that I ran right out to JoAnn's with the kids in tow, to find this basket.  I had all of the paint and fabric at home so all I needed was the basket. 

I wasn't crazy about the green liner that came with the basket so I sewed a new one.  I just used a piece of leftover drop cloth that I had from another project and then made a ruffle for it.

So here it is again, as I found it at JoAnn's

and here she is with her new paint job, a ruffled liner and her wheels!
~ ~ ~
Now, for where I found this amazing tutorial...the fabulous Rosemary from Ozma of Odds!!  She is simply charming and she has a treasure trove of a blog too.  Rosemary has so many beautiful things that she shares with all of her readers and her tutorials are very easy to follow.  I'm not going to re-type the whole tutorial here, but if you go on over to her blog, you will find step by step instructions on how to make one of these baskets! 
I was so excited to find this tutorial!!
I can give you the info though, about the basket in case you would like to make one too.

It can be purchased at JoAnn Fabrics (make sure to take your 40% off coupon though)
here is a direct link to the basket...if you buy it online, it's on sale right now for $19.99
if you buy it in the store, it's full price so take your coupon!
Have fun and go see Rosemary!!

xo and God Bless,
Kathleen
Friday, November 11, 2011

DIY Burlap Pillow

I have a quick project that I want to share.
I was in Hobby Lobby last week and saw some really pretty French inspired pillows.  They had graphics printed on them and I loved them, but not their price tag! 
So this is what I did:
you only need a few things...
burlap
sewing machine or needle and thread if you wish to hand sew
a printer
freezer paper
spray adhesive
one sheet of copy paper
metal spoon

I think that just about covers it.
Here's what you do:
First things first...sew a pillow cover out of your burlap, then
find a graphic that you like.  I went to The Graphics Fairy again for mine.  Take a piece of freezer paper and lay it shiny side down on your work surface.  Get your sheet of copy paper and spray it lightly with spray adhesive.  Lay it down on the dull side of your freezer paper and then smooth it out.  Cut the freezer paper to size by cutting around the edges of the copy paper.  Place this in your printer paper tray.  You want the image to print out on the shiny side of the freezer paper so make sure that your freezer paper is situated properly in the paper tray to do this.  Now you print the image. 
 **Remember to reverse or "mirror" your image before you print if it contains letters or numbers**
Final step:
Carefully remove the freezer paper from the printer taking care not to smear the ink.  Lay it print side down on your fabric and burnish with the back of a spoon.  Try not to let the paper slide around while you do this as it will smear.  You can tape it down if you wish.
Pick up your paper and voila!  A pretty printed pillow cover.
What I love about this method of transfer is that the image comes out faded.  I think it really gives the fabric and aged, worn look!


I like it even better than what I saw at Hobby Lobby! Have a great day everyone.
xo and God Bless,
Kathleen

edited to add:
I meant to add this link to the blog that inspired the idea of using freezer paper to transfer the image

Thursday, November 10, 2011

Claw Foot Table Makeover and French Script


What do claw feet and French script have to do with each other, you ask?
Well, read on and I will show you.

I was at Goodwill the other day and I found this AWESOME table...

I know, when you look at this before photo, it doesn't look very awesome.  I mean, it was kind of beat up, scratched up in places

and it had this smoked glass top with tape stuck all over it.  But those claw feet - it had potential and I knew I wanted it.

That smoked glass...I wasn't particularly crazy about it and that's where the French script comes in.  I went to The Graphics Fairy...Karen is awesome...I've used the word awesome entirely too many times already in this post.  Anyway, Karen has literally thousands of graphics that she so graciously shares with us so that we can make all of these fabulous projects.  I printed off a few of my favorites and then used them to decoupage onto the glass.  While the glass dried, I sanded the entire table, wiped it down then painted it with Rust-oleum Painter's Touch 2x spray paint in "winter gray."  Love that paint (it's awesome)!
Once the paint dried, I sanded down the edges to distress it a bit.  Then I went over the whole thing with Minwax Dark Walnut stain #2716 (small sections at a time) and wiped it off as I went.
Love these claw and ball feet
and curvy legs.

Here she is all finished!
  Another fun Goodwill makeover!
Oh and guess what?  I found another lamp to make over with mirror paint.  I actually already painted it and it's the one you see peeking out there on the table in the above photo.  Now I have matching lamps! 

Have a great day!
xo and God Bless,
Kathleen

Friday, November 4, 2011

Make Your Own Mercury Glass and.....a Lamp Re-fashion

I love mercury glass but it can be expensive. 
I decided to make my own and I think it turned out pretty close to the real deal!
I'm going to tell you how I did it!  Here is my version of this DIY project:

First, you're going to need a can of this Looking Glass spray paint.  It's made by Krylon and I found mine at Hobby Lobby.  You will also need a few cotton balls and a bottle of black acrylic paint.  Lastly, find a clear glass vase or candle holder.  I forgot to take a picture before I painted mine, but it was just a plain glass vase that I bought at Walmart.
There are only a few steps involved and it is very easy and quick. 
First, spray the INSIDE of your container with a very light coat of the mirror paint.  It will appear dull at first but as it dries, it will become really shiny.  Repeat with very thin coats of paint until you have 5 coats applied.  When it dries, put a bit of black acrylic paint on a cotton ball and gently rub in a circular motion randomly around the inside of the glass.  This will remove bits of the mirror paint leaving an antique looking finish.  If you find that you have removed too much {which I did} you can just spray another really light coating of mirror paint around the inside of your glass container. 
 
Once it's all dry, put a candle inside and there you have it, your own DIY mercury glass container!
~ ~ ~
While I had the mirror paint out, there was another thing I wanted to try.  I've seen this done on Pinterest too, and loved it!  This lamp here was my inspiration.  It is the Haley lamp from Crate and Barrel.  I loved the finish but wasn't as crazy about the modern shape so I decided to try and find something a bit more traditional.
Off to the thrift store I went to see what I could find.


This is what I found at the Salvation Army store and it was a mere $2.50.
Perfect!!

I sprayed it with the same mirror paint from above.  5 very light coats and a linen drum shade...

a few wicker picnic baskets from Goodwill...

and you have a fun vintage-y tabletop display!

Have a good weekend!

xo and God Bless,
Kathleen